Check Out Some Useful Tips to Pour Your Concrete
Ten Simple Steps to Pouring Your Own Concrete
This is intended to help you plan, complete, and enjoy your own concrete project. Just follow these steps, and you can have a finished concrete project of your own!
Step One - Plan
There are several things you must do to plan your project. First, you need to prepare the area. This includes removing tree roots, grass, etc.
Also, check that there is proper drainage (it’s graded properly). A good idea is to sketch out the project area using graph paper and scaling down the job so that each square is equal to one foot.

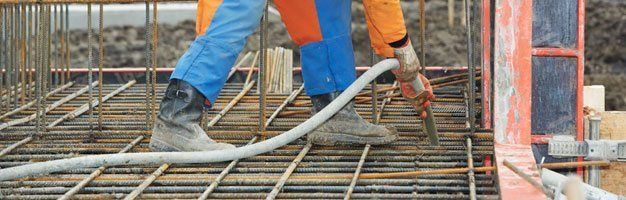
Step Two - Forms
2 x 4’s and 2 x 6’s are most often used in forming an area for which the concrete will be poured. The concrete should NOT be poured at a thickness of less than 3 1⁄2”. The form should be held in place by stakes.
Keep in mind that the stakes must NOT extend above the form or they’ll interfere with “screeding”. Move the “screed” board across the forms to check the grade and measure the distance from the board to the grade.
Step Three - Calculate Quantity
A cubic yard is used to measure concrete. A box that measures 3’ x 3’ x 3’ (27 cubic feet) requires one yard of concrete. NOTE: You should factor in an extra 5-10% to allow for spillage, uneven grade, etc.
To determine square feet of surface area, multiply length by width (in feet) or use our Concrete Calculator. For instance, a 9’ x 10’ patio = 90 square feet.
Here is a quick reference chart to help you estimate your project:
Thickness of concrete Square feet covered by one cubic yard
3” 108
4” 81
5” 64
6” 54
Step Four - Tools
Here are some tools you may need to help you complete your job successfully: edgers, floats, trowels, bull floats, shovels, wheelbarrow(s), rakes, push brooms, etc. Also, remember to assign jobs to helpers before the concrete arrives (i.e., Who screeds, bull floats, washes tools? etc.)
Step Five - Call for Delivery
Once you have completed steps 1-4, it’s time to call Custom Concrete at 845-691-3535 to schedule a delivery! We bring you the amount you need and mix it fresh. With our on-site delivery service, there is never any waste and you pay only for what you use.
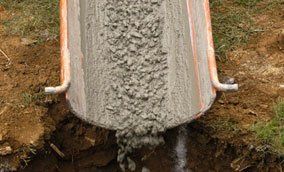
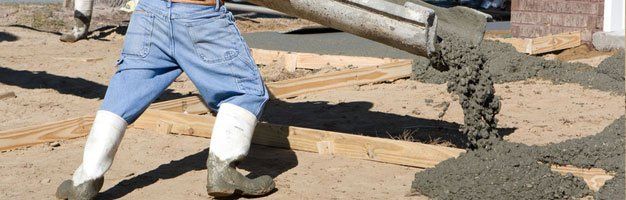
Step Six - Fill the Forms
Fill the forms with concrete either directly from the truck or by using a wheelbarrow. Use a 2 x 4 in a sawing action on the screed board as it rests on the forms. Move it in the direction of the pour.
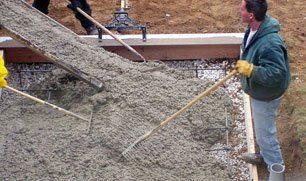
Step Seven - Floating
“Floating” is necessary to smooth out irregularities left behind by the screeding process. A wood or metal float may be used to accomplish this. NOTE: Do not overwork the concrete and pay close attention to the edges.
Step Eight - Edging
Edging the concrete adds a professional look to the project. An edging tool is a small trowel with a rounded edge. This should be done as soon as possible so that any small rocks can be pushed back into the concrete.
Step Nine - Final Finish
Once any extra water (commonly referred to as “bleeds”) evaporates, then it’s time to add the finishing touch. There are two options at this stage depending on your project.
Option One:
Finishing basement or garage floors for these floors, the desired effect is a very smooth surface. This can be achieved by using a smooth steel trowel.
Option Two:
Finishing outdoor projects such as patios, sidewalks, and driveways
For these surfaces, a more textured, safer surface is often desired for outdoor use. This can be achieved by first lightly using a smooth steel trowel. Next, pull a soft-bristle broom in a straight line across the concrete’s surface.
Step Ten - Curing
It takes approximately 28 days for concrete to reach its maximum strength. This is a gradual process. In order to achieve its maximum strength, it must be kept moist for 5-7 days. Concrete cures faster in hot weather (leave forms on for three days) and longer in cooler weather.
To prevent the concrete from drying out, apply a good concrete sealer a few hours after finishing. In order for the concrete to set up, it undergoes a chemical reaction. Water is the key ingredient in this reaction. Keeping it moist helps the concrete reach maximum strength and prevents scaling, peeling, etc.
NOTE: De-icing salts should be avoided on concrete—especially for the first winter.
If you have more questions and concerns after reviewing these quick steps, please feel free to give us a call with your dimensions (including thickness) and we will be happy to help you calculate the amount of concrete you will need and answers any uncertainties.
Call us at 845-691-3535 for FREE estimates!
"I have been in the concrete trade since the late 70’s and have dealt with many concrete companies in that time.
Custom Concrete always has been a pleasure to do business and consistently delivers on time service and excellent materials.
Excellent service..."
Martin Santer (S.V.S. Masonry, Inc.)